I was sitting at a coffee shop last week, watching someone spend ten minutes trying to find the perfect “aesthetic” angle for their latte, only to end up with a blurry, overexposed mess that looked nothing like the real thing. It’s frustrating because we’ve been sold this lie that you need a $1,200 Pro Max or a ridiculous array of external lenses to capture a decent memory. Honestly, the obsession with gear is just more digital noise we don’t need. If you’re actually looking for how to take better phone photos, you don’t need a bigger budget; you need a better system.
I’m not here to give you a lecture on aperture or complex manual settings that you’ll never use. Instead, I want to share the lean, repeatable habits I’ve built to strip away the guesswork. We’re going to focus on a few high-leverage adjustments to your lighting, composition, and even how you physically hold your device. My goal is to help you stop wrestling with your settings and start capturing moments that actually feel like they did in real life. No hype, just practical workflows that work.
Table of Contents
Mastering Mobile Photography Composition Rules Without the Stress
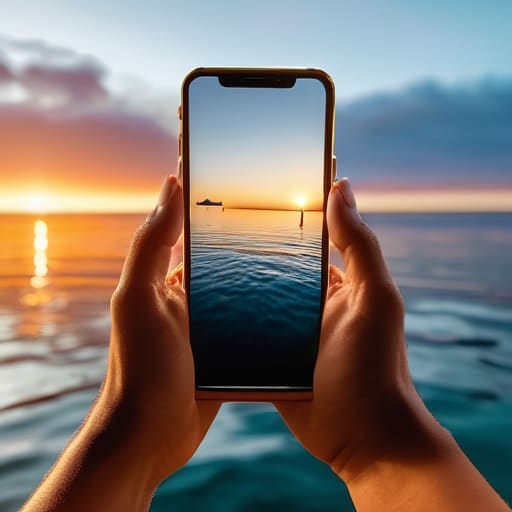
Look, you don’t need a degree in fine arts to frame a shot that doesn’t look amateur. Most people just point and shoot, which is why their feed looks like a random collection of snapshots. If you want to level up, you need to internalize a few mobile photography composition rules so they become second nature. Start with the Rule of Thirds—turn on that grid in your settings and stop placing every subject dead center. It sounds basic, but it’s the fastest way to move from a “snapshot” to an actual composition.
I also used to struggle with depth, making everything look flat and boring. Now, I look for leading lines—think of a sidewalk, a railing, or even a shadow—that pull the eye toward the subject. It’s about creating a path for the viewer to follow. If you’re feeling experimental, try playing with macro photography with smartphones to capture textures that the naked eye usually misses. You aren’t just taking a picture of an object; you’re capturing a perspective. Once you stop worrying about the “perfect” shot and start focusing on how elements sit within the frame, the stress of “getting it right” just evaporates.
Simple Smartphone Lighting Techniques for Real Life

Look, I’m not a professional photographer, and I don’t have a studio setup in my backpack. Most of the time, I’m just trying to capture a decent shot in a dimly lit coffee shop or under some harsh streetlights. The biggest mistake I see people making is fighting against the environment. Instead of trying to force a perfect shot, I’ve learned to lean into what’s available. One of my go-to smartphone lighting techniques is simply finding the “golden window”—that specific spot where natural light hits a subject without blowing out the highlights. If you’re indoors, move closer to a window. It sounds basic, but natural light is your best friend when you’re trying to avoid that grainy, digital look.
When the sun is high and everything looks flat or washed out, don’t panic. I usually look for “open shade”—the kind of soft, even light you get under a tree or the shadow of a building. This is a game-changer for improving smartphone image quality because it eliminates those nasty, high-contrast shadows that make your photos look amateur. If you’re dealing with low light at night, stop using that tiny LED flash that makes everyone look like a deer in headlights. Instead, try to find a nearby neon sign or a shop window to act as your light source. It’s about working with the light you have, not wishing for light that isn’t there.
The Low-Effort Setup: 5 Tweaks to Stop Fighting Your Camera
- Clean your lens. Seriously. I know it sounds stupidly basic, but most of my “blurry” shots were just fingerprint grease. Give it a quick wipe with your shirt before you pull it out; it’s the fastest way to go from a hazy mess to a sharp image.
- Lock your focus and exposure. Don’t let the phone decide what’s important. Tap your subject on the screen, then hold your finger down until the “AE/AF Lock” pops up. From there, slide the little sun icon down to kill the overexposure. It makes everything look way more intentional.
- Turn off the digital zoom. Pinching to zoom is a trap; it just kills your resolution and makes everything look grainy. If you want a closer shot, move your feet. It keeps the quality high and forces you to actually engage with the scene.
- Use the grid lines to stay sane. Go into your camera settings and toggle the grid on. It’s not just about the Rule of Thirds; it’s about making sure your horizons aren’t crooked. A tilted ocean looks like a mistake; a level one looks like a choice.
- Shoot in RAW if you actually care about editing. If you’re planning to tweak the colors later, check if your phone supports ProRAW or similar formats. It saves way more data, meaning you won’t lose your mind trying to fix a crushed shadow or a blown-out sky later on.
Stop Overthinking, Start Shooting
At the end of the day, better photos aren’t about having the latest $1,200 titanium smartphone or knowing every single technical spec in your camera app. It’s really just about building a few small, repeatable habits. We’ve covered how to use composition to guide the eye, how to hunt for natural light instead of fighting harsh shadows, and how to keep your lens clean so your shots don’t look like they were taken through a layer of grease. If you can master just these few fundamental systems, you’ll stop fumbling with your settings and start actually capturing the world around you. It’s about reducing the friction between your eyes and the shutter button.
My advice? Don’t wait for the “perfect” moment or the perfect lighting setup to start practicing. The best way to get better is to just keep the phone in your pocket and snap things as they happen. Perfection is a trap that leads to digital fatigue; I’d much rather see a slightly imperfect photo that actually captures a real feeling than a sterile, over-edited shot that feels soulless. Stop worrying about the gear and just focus on the moment. You don’t need a masterpiece every time you hit the button; you just need a system that lets you reclaim the joy of being present.
Frequently Asked Questions
Should I actually bother buying a clip-on lens, or is that just more clutter I don't need?
Honestly? Skip it. Most of those clip-on lenses are just more clutter that’ll end up at the bottom of a drawer. They’re often low-quality, distort your edges, and frankly, they’re a friction point. If you have to fumble with a piece of plastic every time you see something cool, you won’t use it. Stick to mastering your phone’s built-in software and lighting first. Don’t add more gear to the mental load.
How do I stop my photos from looking grainy when I'm out at night or in a dim restaurant?
The graininess—or “noise”—is basically your phone’s sensor panicking because it’s starving for light. To fix it, stop relying on your flash; it usually just makes everything look flat and harsh. Instead, look for a nearby lamp or even a candle to give your subject some actual illumination. Most importantly, steady yourself. Lean your elbows on the table or use a wall to keep the phone still. That extra second of stability makes a massive difference.
Is there a specific app I should be using, or can I actually get good results just using the native camera app?
Honestly? Stick to your native camera app. Most of us aren’t professional colorists, and chasing third-party apps usually just adds more friction to your workflow. Your phone’s built-in software is already optimized for your hardware. Instead of downloading another heavy app that eats up storage, focus on mastering your manual settings—exposure and focus—within the app you already use. Let’s keep the system lean; if the tool works, don’t overcomplicate it.
How much editing is too much before a photo starts looking fake and loses its vibe?
Look, there’s a fine line between “enhancing” and “erasing.” If you’re sliding the saturation bar until the sky looks like neon paint or smoothing skin until people look like CGI characters, you’ve gone too far. You’re losing the vibe. My rule of thumb? Edit to fix the technical flaws—like a bit of exposure or contrast—but leave the soul of the moment intact. If it looks like a filter, it’s probably too much.